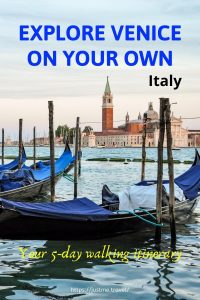
How to Spend 5 Days in Venice, Italy – a solo traveller’s perfect self-guided walking itinerary Join me on a leisurely journey around Venice – on a ‘walkabout’. Over four…
How to Spend 5 Days in Venice, Italy – a solo traveller’s perfect self-guided walking itinerary
Join me on a leisurely journey around Venice – on a ‘walkabout’.
Over four days, my self-guided walk led me to some incredible experiences as I strolled through and discovered five of Central Venice’s six districts. On the fifth day, I went island hopping to Murano and Burano.
It is possible not to get lost in Venice if you allow yourself just to wander; with the very occasional “Where am I?” moments. The secret being that Venice has got wise, and everywhere you go there are strategically placed signs pointing the way to St Mark’s Square or Rialto Bridge, both major landmarks. However, I have to confess that I did pull out the map once – in San Polo. I had wandered down so many narrow alleyways that when I entered a tiny courtyard, I didn’t even know which direction I was facing.
Venice is flat. The best way to see it is just to walk. With my camera slung over my shoulder, my favourite walking shoes on, and my trusty guide book in hand, I let my feet and curiosity find the direction.
The starting point for each day’s walk was my hotel, Hotel da Bruno, in the San Marco district. Located at Sestiere di Castello 5726/A – 30122, Hotel da Bruno is ideally located in Venice’s historic centre. For my review on Hotel da Bruno, refer to the section, ‘Where I stayed’ at the end of this post.
As I have taken a different district each day to explore, you don’t have to follow my self-guided walking itinerary per se. This post is a guide, explore what you want, mix it up, or add to the discoveries.
This guide is an updated version of the post, A Venetian Walkabout. Originally Published: January 23, 2018. Updated: August 5, 2020; providing more information and resources.
Let’s walk together. Or step out on your very own walking itinerary.
- Day 1: San Marco
- Day 2: San Polo and Santa Croce
- Day 3: Cannaregio
- Day 4: Castello
- Day 5: Island hopping – Murano and Burano
- When to go
- Getting there and away
- Where I stayed
Day 1: San Marco
On my first day in Venice, I wandered down alleys, crossed some of Venice’s 400 unique bridges and watched the waters of the canals lap the doorsteps of antique buildings in various states of glorious decay. Everywhere I turned I saw evidence of Venice’s unstable foundations, with lopsided arches and leaning church bell towers. So much to photograph. I have fallen in love with Venice.
Over a coffee in Campo Santa Maria Formosa, I saw canal barges loading the linen from hotels and learned from the waiter it is taken off the islands to the mainland for laundering so as not to pollute the canals.
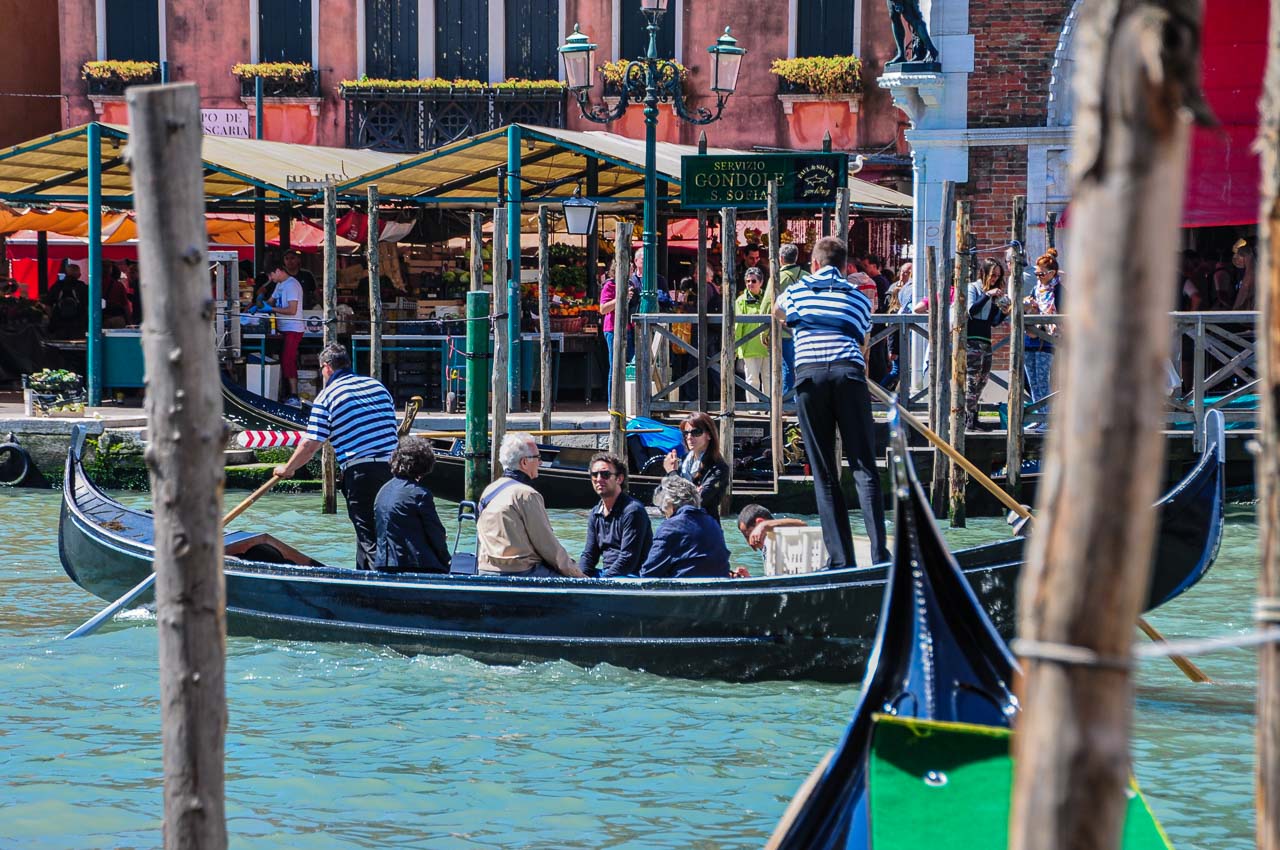
Taking in my surroundings from one bridge, I witnessed a gondola traffic jam and was thankful I was not playing tourist.
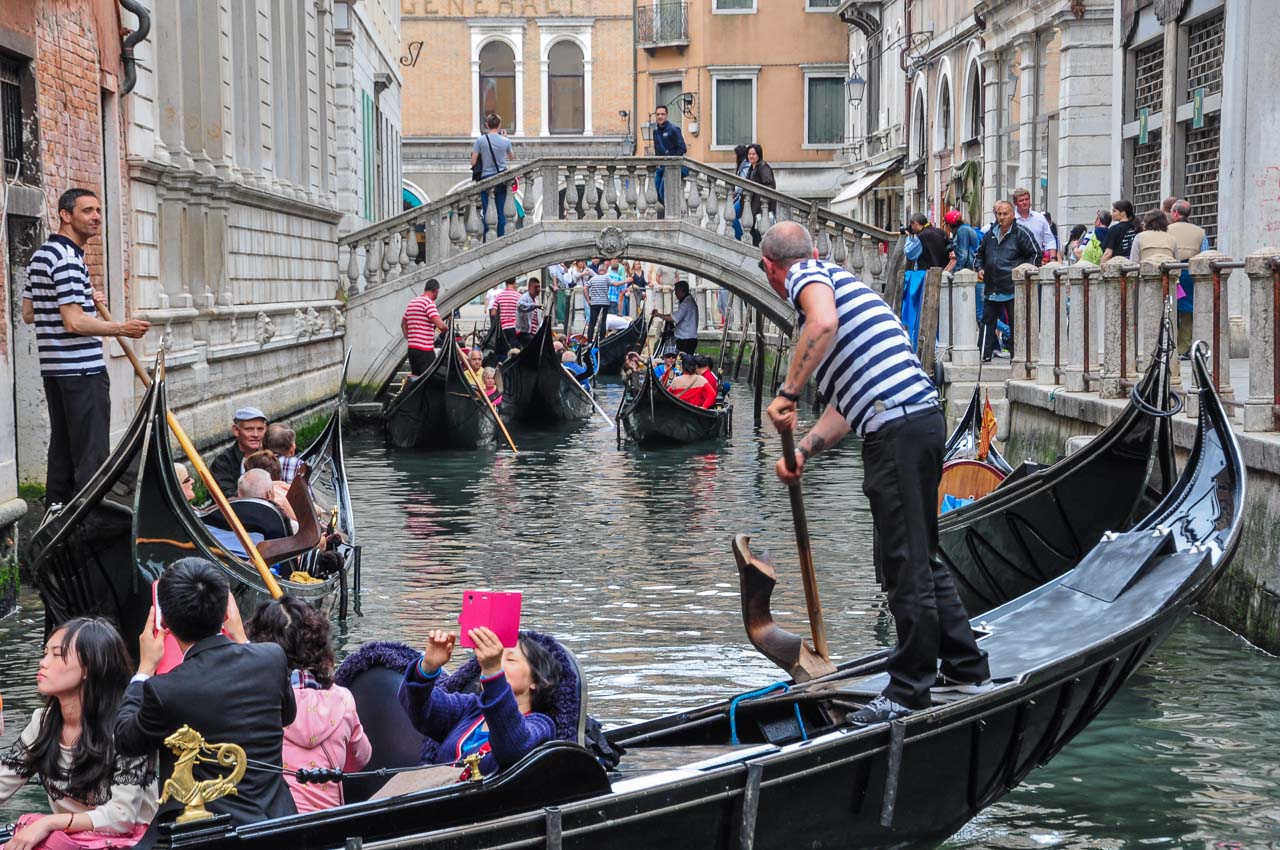
Gondola traffic jam
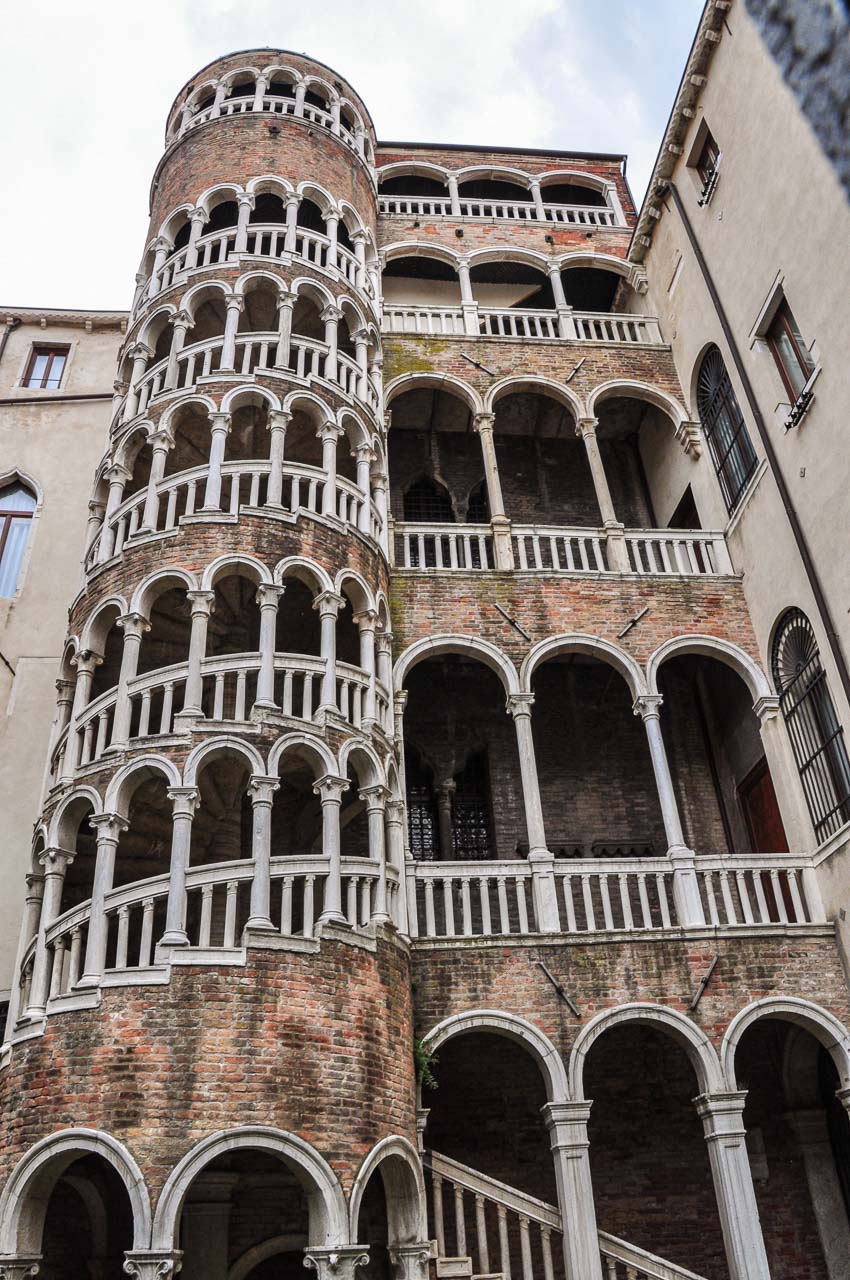
Contarini del Bovolo Palace
Venturing down a very narrow alley near Campo Manin, requiring me to maneuver through crab-like, I came across an unusual building with the most elegant external multi-arch spiral staircase – the gothic Palazzo Contarini del Bovolo. The staircase, with its ascending rows of round-headed arches, is the only one of its kind found in Venice today. Closed at the time of my discovery, I let my camera do the sightseeing.
Stumbling across Piazza San Marco (St Mark’s Square) for the third time within half an hour, I decided it is time to experience a coffee at the iconic Café Florian in St Mark’s Square. Established in 1720, Café Florian is the oldest café in Venice and claims to be the oldest in the world. At the cost of €15 for my coffee, I knew it was an experience I would not be repeating.
As I wandered around Basilica di San Marco (St Mark’s Cathedral), marvelling at the brilliant mosaics, I wondered at the story of the two merchants from Alexandria in Egypt stealing St Mark’s body and bringing it back to Venice. And then there is the miracle of St Mark’s body reappearing in 1094 after being destroyed by fire in 976. St Mark’s body now lies in the Cathedral’s altar.
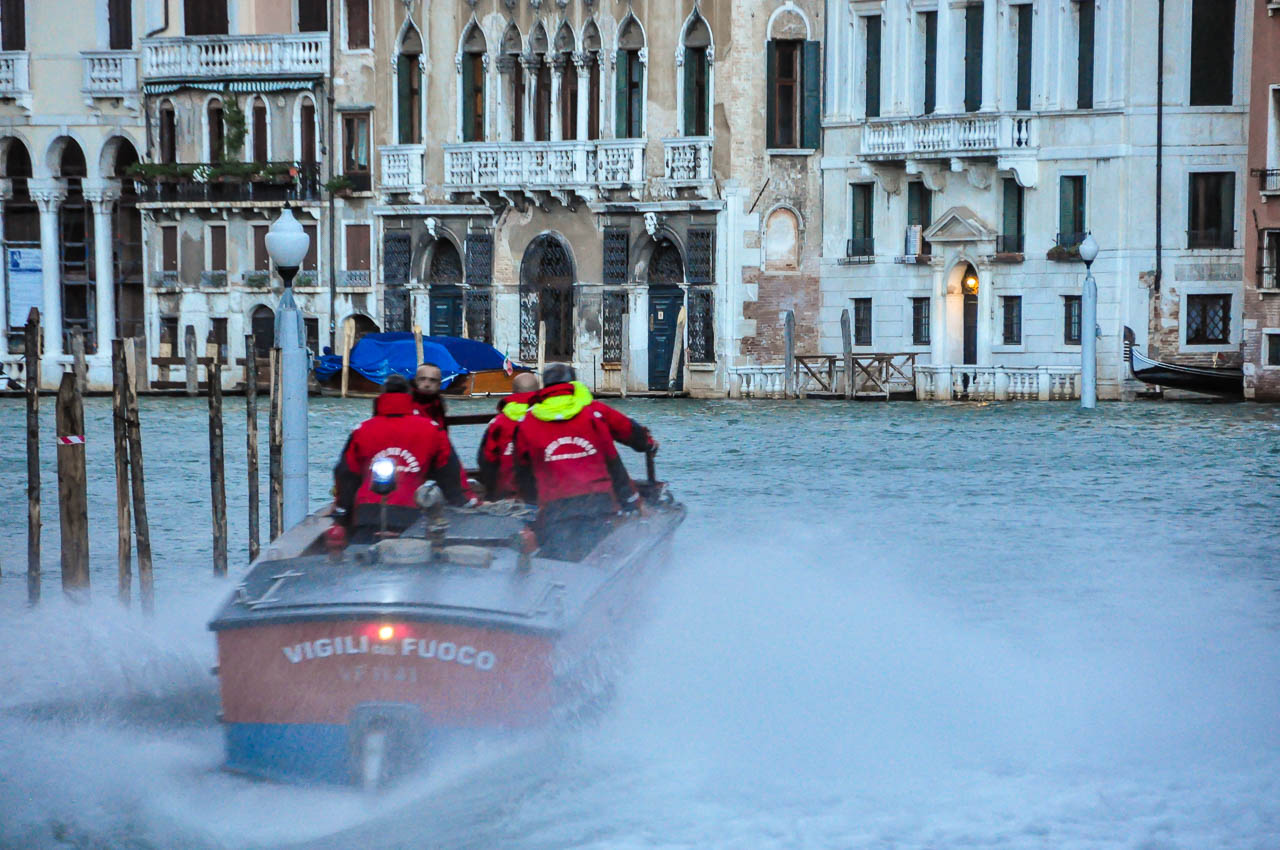
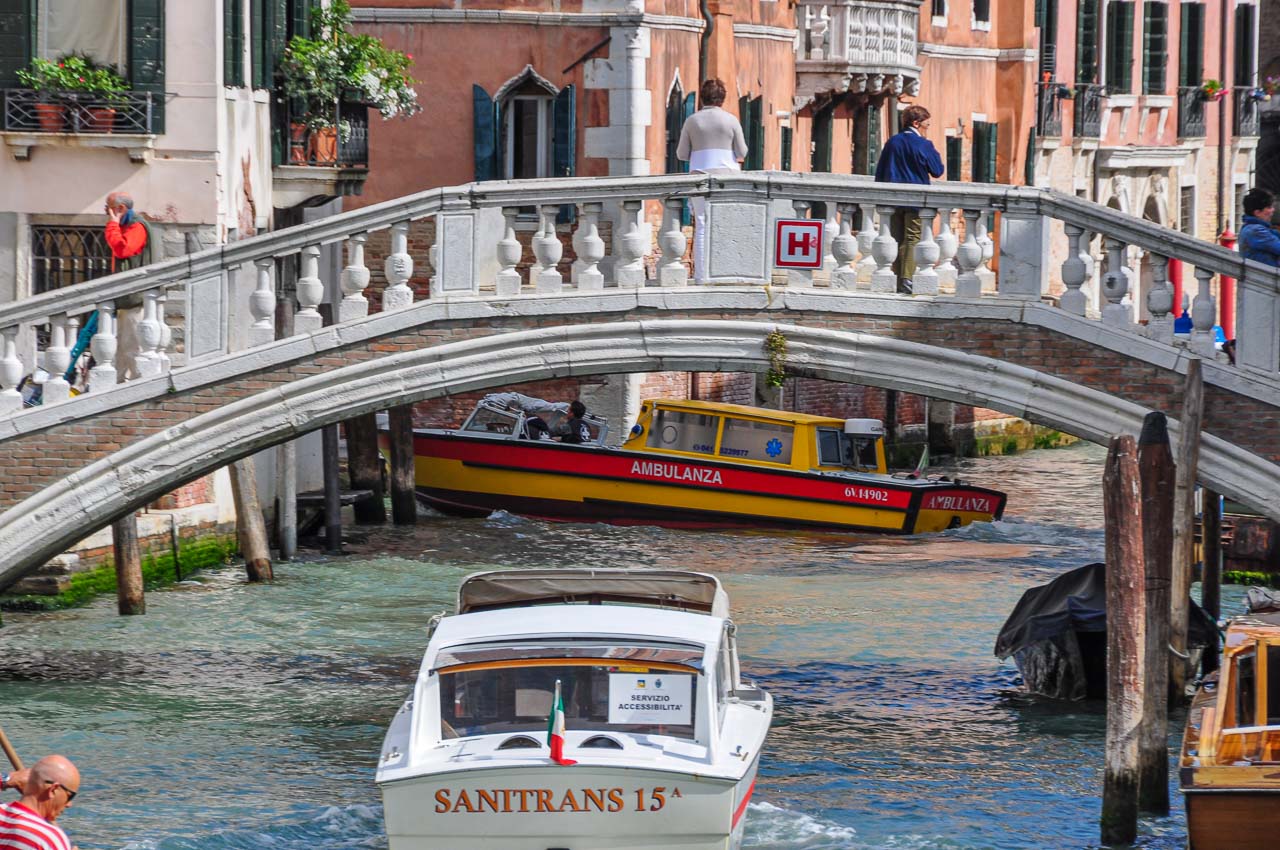
I experienced a sense of awe as I watched a fireboat race down the Grand Canal and disappeared into a side canal. My amazement was due to the unusual sight of a ‘fire engine’ being a boat and not a large truck. Later, I witnessed an ambulance maneuver into a narrow canal.
Day 2: San Polo and Santa Croce
The defined boundaries between San Polo and Santa Croce are not as clear-cut as those of Venice’s other four districts. Hence, their grouping together in this post and many guide books.
Crossing the Grand Canal from San Marco into San Polo via Rialto Bridge, my first stop this morning was Rialto Markets. Markets are a great way to gain an understanding of the local people; providing an insight into the local culture. As I wandered around the vegetable section of Rialto Markets and chatted to the stallholders, I learned the humble tomato is not so ordinary. Firstly, there are 25 tomato varieties in Italy. Secondly, no self-discerning vendor will sell you tomatoes without first knowing what you are cooking. To know it is imperative because they all have a different taste and must accompany the right dish. Only by understanding what you are cooking can the stall owner advise on just the correct type of tomato to use. I have to admit my palate is not up to Venetian tomato standards.
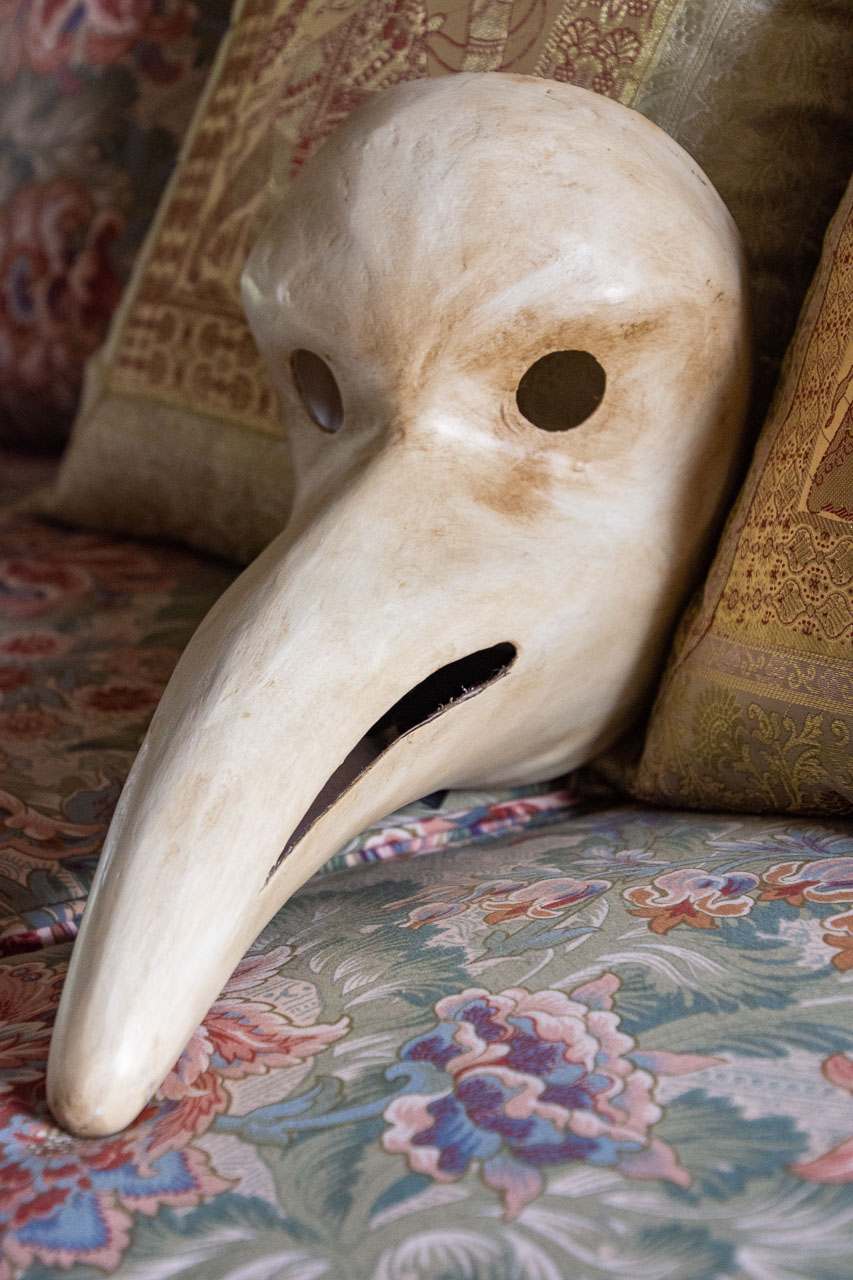
The Plague Doctor Mask I bought from Tragicomica
Walking past San Giacomo di Rialto’s 15th-century 24-hour clock and through Campo San Polo, I found the shop Tragicomica on Calle dei Nomboli, San Polo 2800, which my research at home before leaving for Italy told me it sold traditional Venetian masks. The shop was crowded – with masks – and I wondered how I was ever going to find that special mask with my name on it. After a lengthy chat with Tragicomica’s artisan Mask Maker about the different types of masks and the history behind the masks, I bought an authentic Venetian, paper-mache Plague Doctor Mask, with its long beak-like nose. The beak was filled with herbs to protect the doctor from the plague.
Sitting in a café opposite the rear of Santa Maria Gloriosa dei Frari, a large Gothic church commonly known as the Frari, I spent a pleasant hour just people watching. Even though Eyewitness Travel (Venice) describes the interior of the church as “striking for its sheer size and for the quality of its works of arts”, I did not venture inside. Instead, I wandered around the church’s exterior taking photos. The front of the church was very plain while the rear was much more impressive architecture.
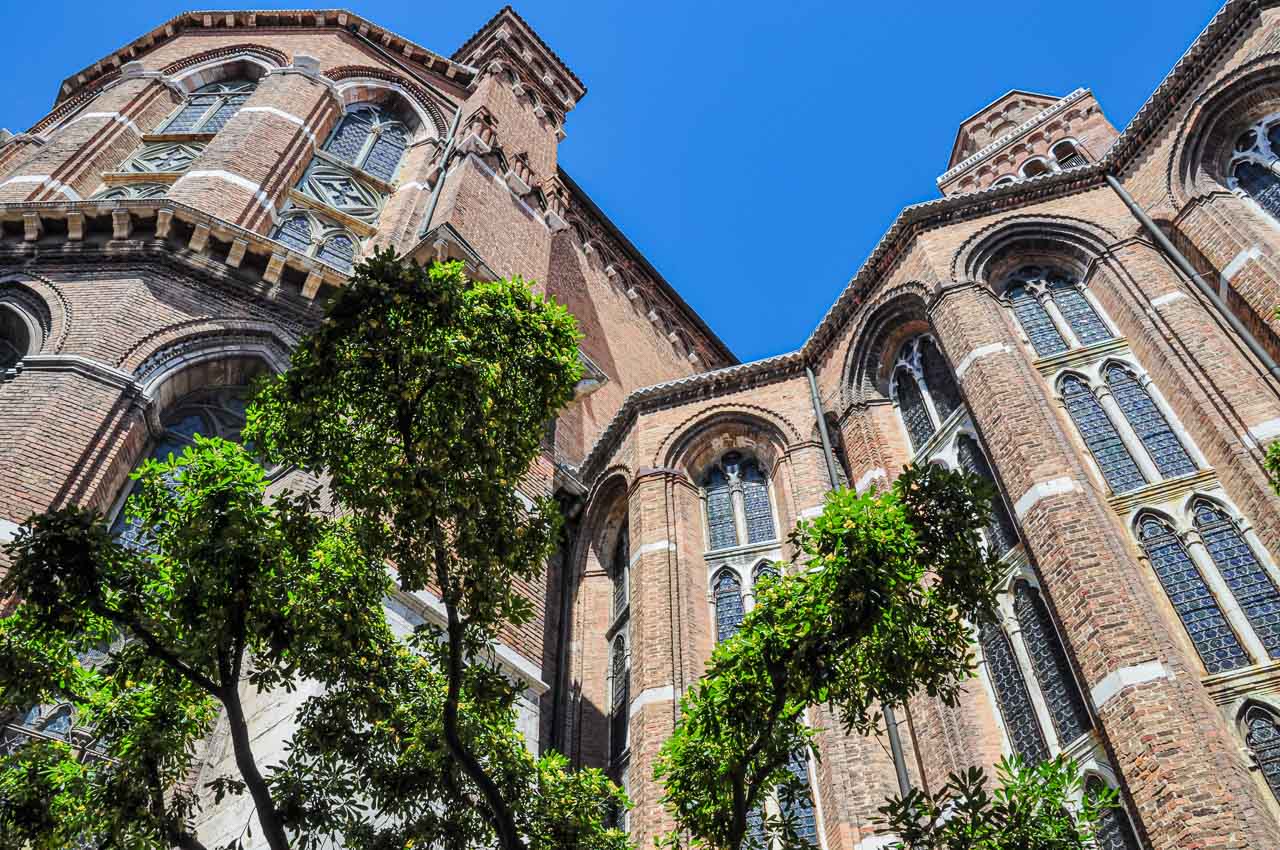
Rear view of the Gothic church, Santa Maria Gloriosa dei Frari
Lunch today was at Pizzeria Cico in Campo San Polo. The food was edible but ordinary, and the Square was plain but great for people watching.
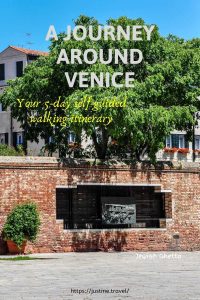
Day 3: Cannaregio
Today was my longest walk – 1.6 kilometres (1 mile) from my hotel, via Strada Nova to the Jewish Ghetto in the Cannaregio district. The walk took me longer than the said 21 minutes because I kept stopping to explore different areas, admire the architecture, and take photos. And I had to stop for a coffee!
The Campo di Ghetto Nuovo, in the heart of the Jewish Ghetto, is a small, pretty Square with compelling monuments to the holocaust. Very tall buildings, unique in Venice, characterise Campo di Ghetto Nuovo. The tall buildings are due to the Jewish population being confined to a tiny area 500 years ago to segregate them from Venice’s Christian population. As the Jewish community grew and needed more housing, the only way was up.
The Ghetto’s five synagogues, unrecognisable from the Square, date back to the 16th century. Through the Jewish museum’s guided tour, the only way possible to see these hidden treasures, I discovered three of the five synagogues on the top floors of buildings – the French, German and Levantine, each representing a different ‘school’.
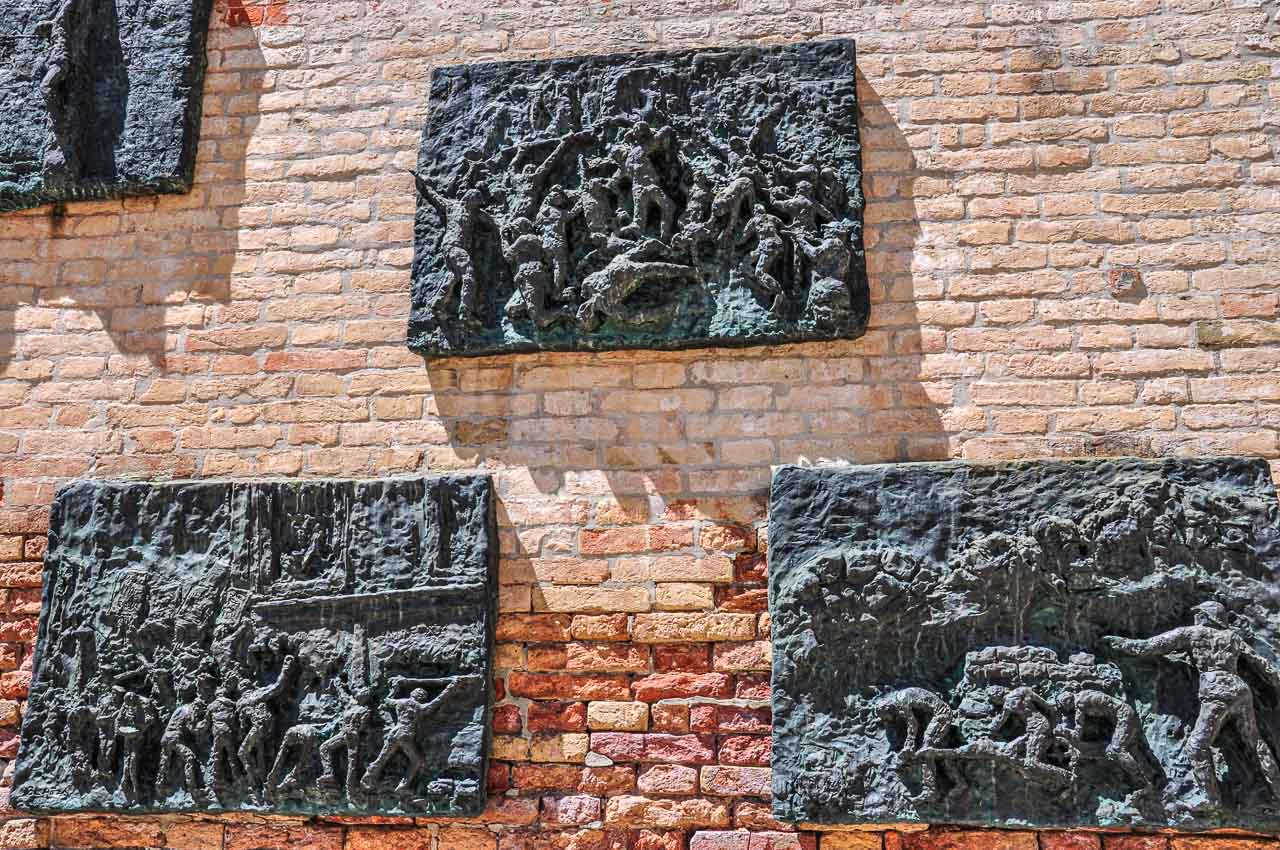
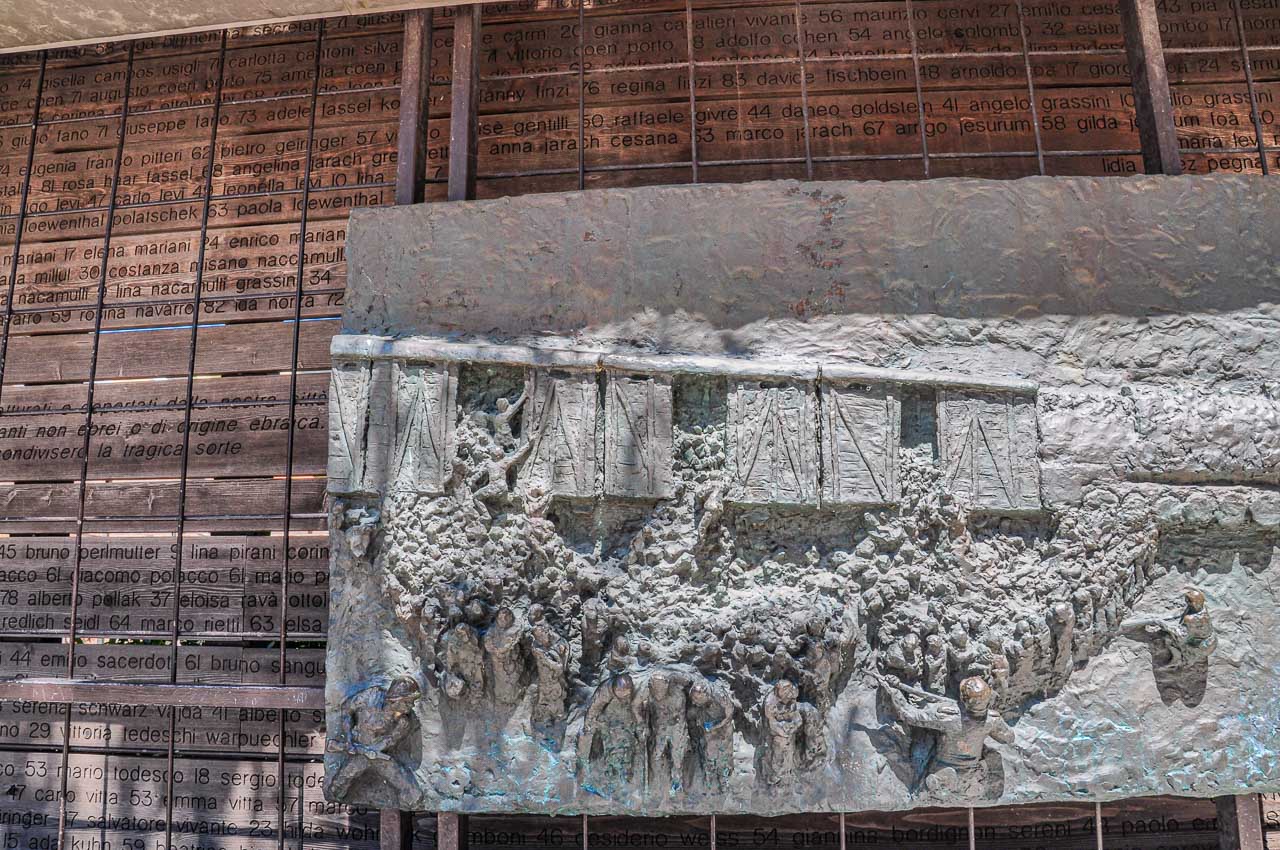
Back in Campo di Ghetto Nuovo, I contemplated the Holocaust memorials depicting Nazi brutality to the Jews during the Second World War.
The Holocaust Memorial on the brick wall in Campo di Ghetto Nuovo, created in 1980, comprises of seven bronze bas-relief plaques depicting deportation, Kristallnacht (the Night of Broken Glass), the quarry, punishment, execution, the Warsaw Uprising, and the final solution. Nine years later saw the addition of another memorial, the Deportation Memorial, also called “the Last Train”. Carved on the wooden boards behind the Deportation Memorial is the name and age of each victim who was deported.
Before the long walk back to my hotel, I had lunch at GAM GAM Kosher Restaurant. GAM GAM is located opposite the main entrance of the Jewish Ghetto on the Canale di Cannaregio – a great place to people-watch while enjoying a leisurely meal. I couldn’t resist ordering the house speciality, ‘Israeli Appetisers with Falafel’, served with the most delicious Italian bread. I was not disappointed and can honestly say this was the best meal I had in Venice.
With my feet crying ‘enough’, I took a traghetto (pedestrian transport) across the Grand Canal, alighting near Rialto Markets. Traghetti are cheap ‘pedestrian’ gondola ferries that just cross the Grand Canal from one side to the other. There are several points along the Grand Canal where you can pick up a traghetto. A traghetto will cost you (the tourist) 2 euros, while residents pay 70 cents. The crossing is so short that locals usually stand up in the traghetto. I sat! I didn’t trust my balance well enough not to end up in the Grand Canal. Did I save any walking distance? Probably not! But for about 6 minutes there, I felt like a real local and knew I had experienced something unique as tourists don’t usually use this mode of transport.
A traghetto (pedestrian transport) crossing the Grand Canal
Day 4: Castello
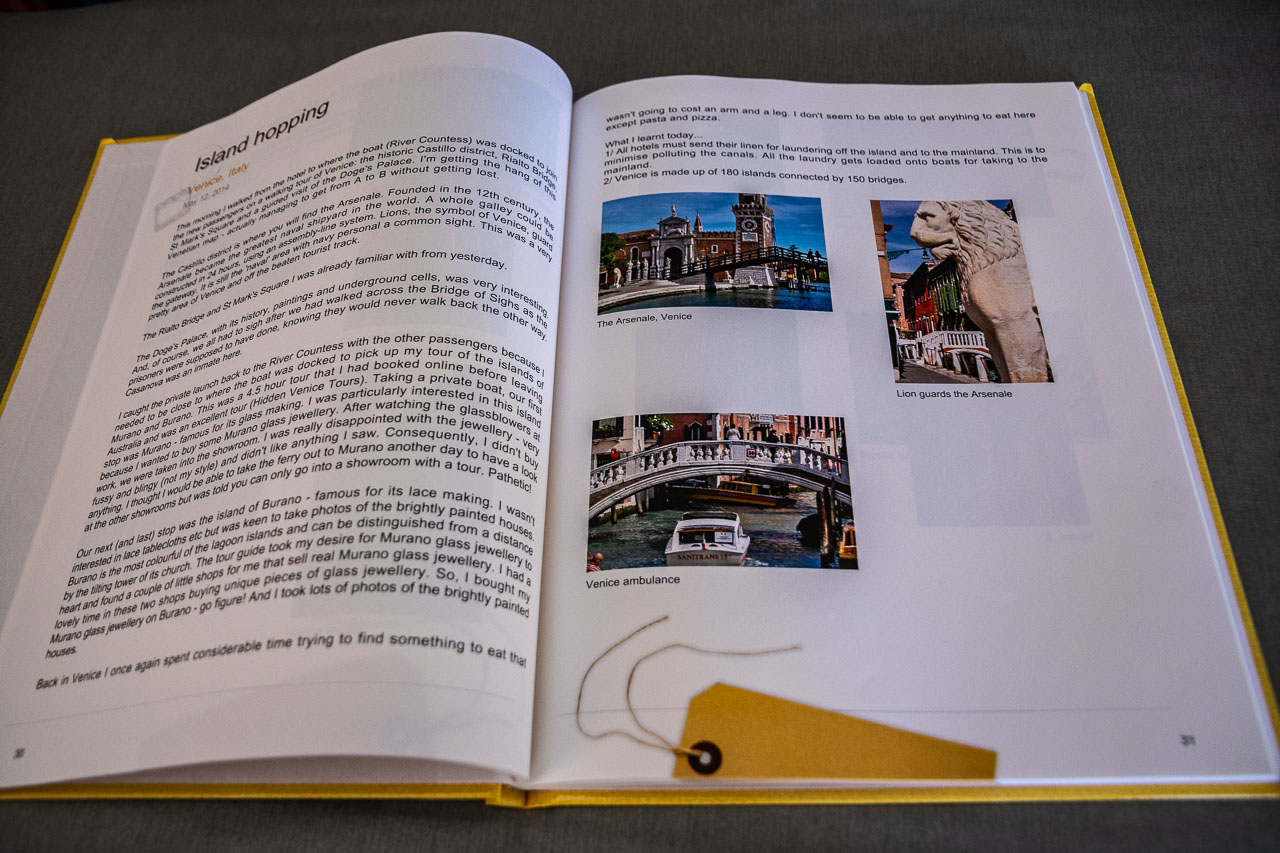
From my hotel, a 15-minute walk this morning took me to the Arsenale in the Castello district. While primarily disused today and, except for exhibitions, closed to the public, the Arsenale was once the greatest naval shipyard in the world. A whole galley, using an assembly-line process, would be constructed in 24 hours. Two massive lion statues (the symbol of Venice) guard the gate to the Arsenale. Venice’s maritime past can be viewed in all its glory at the Naval History Museum, near the Arsenale. I found naval personnel a common sight around the Castello neighbourhood.
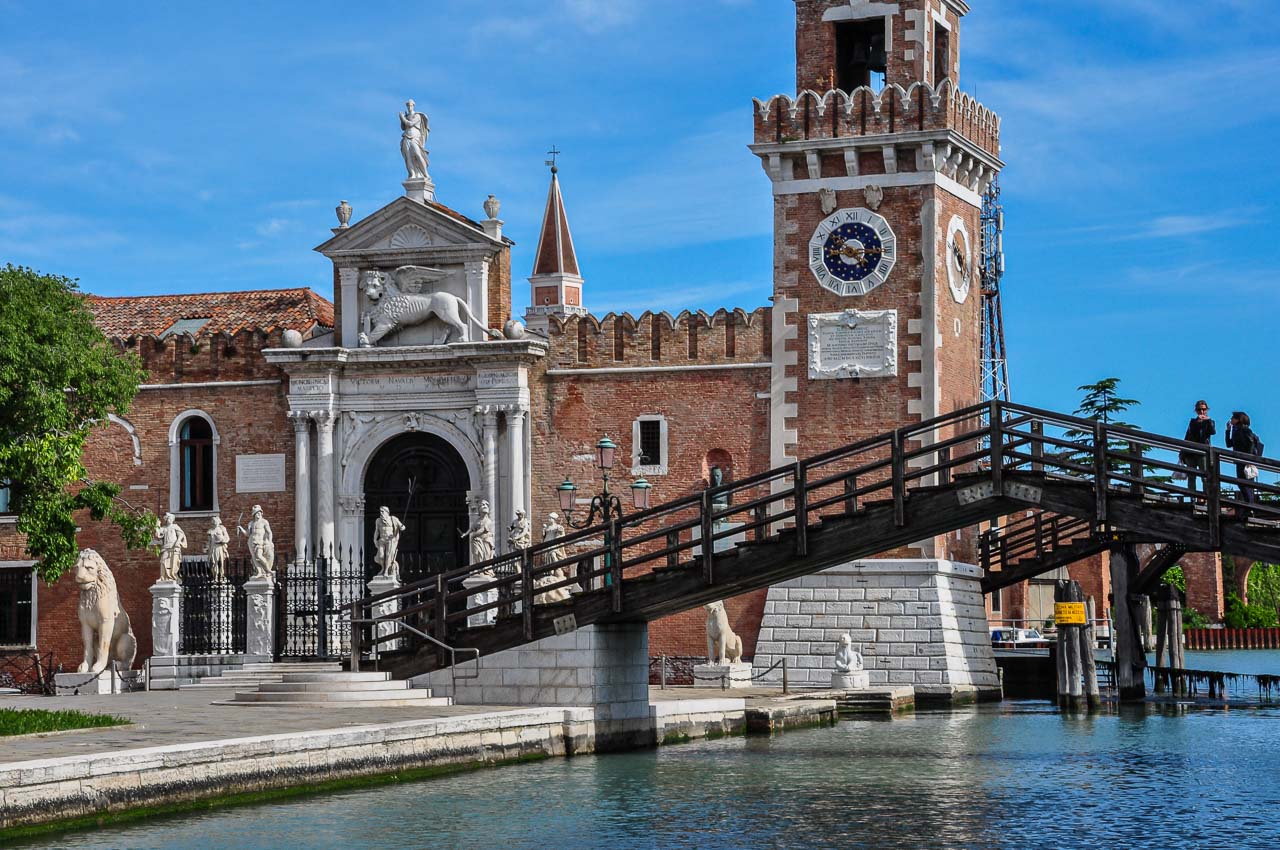
The Arsenale
The largest of Venice’s six districts, Castello was a lovely area to walk around and lacked the tourist crowds found in neighbouring San Marco. My wandering took me to Via Giuseppe Garibaldi. Lined with restaurants, bars and cafés, Via Giuseppe Garibaldi is Venice’s widest street due to it being a filled-in canal. Feeling hungry, I stopped for a sandwich and coffee at Hopera Coffee and Bakery on Via Giuseppe Garibaldi.
Heading back towards Piazza San Marco, as I crossed Ponte Canonica, I saw for the first time Venice’s most famous and only covered bridge, the Bridge of Sighs (Ponte dei Sospiri). This little Baroque bridge spans the canal, Rio di Palazzo, between the New Prison in the Castello district and the Palazzo Ducale (Doge’s Palace) in the San Marco district. From Ponte Canonica, I had an uninterrupted view of the Bridge of Sighs for my camera to record the moment.

The Bridge of Sighs
After a coffee and people watching from Ristorante Carpaccio on Riva degli Schiavoni, Venice’s most famous promenade, I took a tour of the Doge’s Palace and the New Prison. The tour included crossing the Bridge of Sighs. Walking across the Bridge, I sighed, just as legend has it that the prisoners did when they crossed the Bridge from the interrogation rooms in the Doge’s Palace to their cell or execution in the New Prison. Catching their last glimpse of Venice through the Bridge’s windows, they sighed, knowing they would never walk back the other way. I learned Casanova was the most famous person to have crossed the Bridge of Sighs on his way to his prison cell, from which he later escaped.
Close to my hotel was a gelato shop, Gelatoteca Suso, on Calle de la Bissa. Before heading back to my hotel, I decided I would try a gelato because everyone I met raved about Venetian gelato and this shop in particular. I am not a big ice cream fan, and this experience did not convert me.
Day 5: Island hopping – Murano and Burano
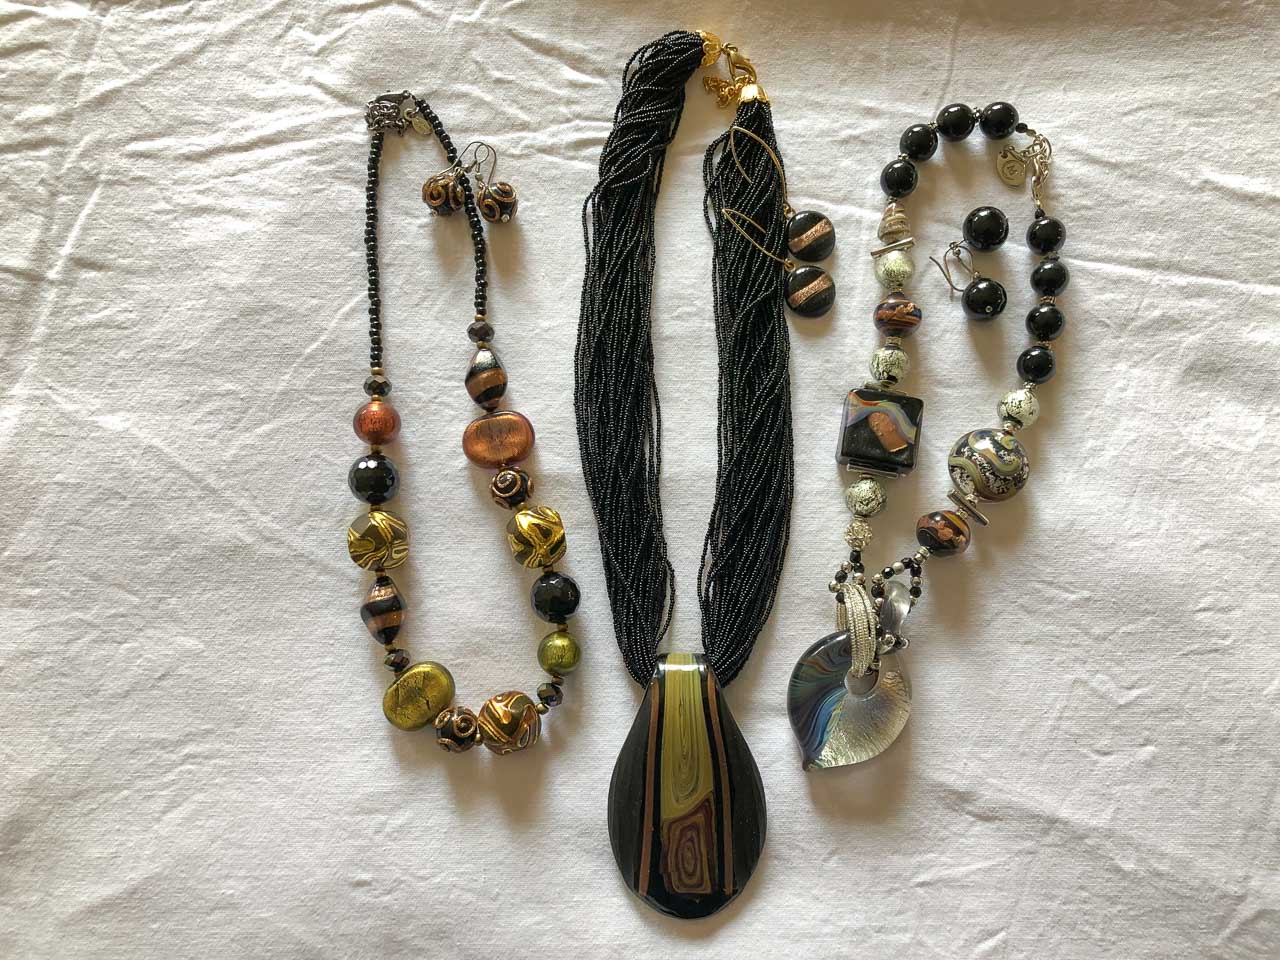
Before embarking on my trip to Venice, I had decided there were two things I wanted to buy – a Venetian mask and Murano glass jewellery. Having bought my Doctor Plague Mask in the San Polo district on day 2, I had that item crossed off my shopping list. Now I needed to concentrate on finding that right piece of Murano glass jewellery. The best way to do this was to go to Murano. So, I took a day tour of Murano and Burano islands. Located in the UNESCO World Heritage Venetian Lagoon, both islands are a short distance from Venice; with Murano being the closest.
Taking a private boat across the Lagoon, our first stop was Murano. Murano is world-famous for its glassmaking and has been since 1291. At this time, there was a forced removal of all the Venetian glassmakers to Murano. Woe betide the glassmaker who tried to leave the island. Any attempt to leave the island would result in severe penalties, including death. The tour included a visit to a glassmaking workshop and a demonstration by the in-house glass artisans. I always feel it is a privilege to watch artisans engaged in their craft. We were given free time following the glassmaking demonstration to shop and explore the island on our own.

Glassmakers working at their craft at a glassmaking factory on Murano
I was now on a mission – to find that piece of jewellery with my name on it (figuratively speaking). I looked through the showroom attached to the glassmaking workshop, but the jewellery was too glitzy, too fussy for my taste. I was not able to access other showrooms (in the hope of finding something more to my liking) as it is only possible to go into a showroom with a tour. With some free time still available, I tried my luck at small, individual jewellery shops. But they offered nothing better. I expressed my bitter disappointment to the tour guide. She offered to take me to a boutique jewellery shop on Burano, where I should find Murano glass jewellery more to my ‘no bling’ taste. Read on to find out why I will be forever grateful to this guide.
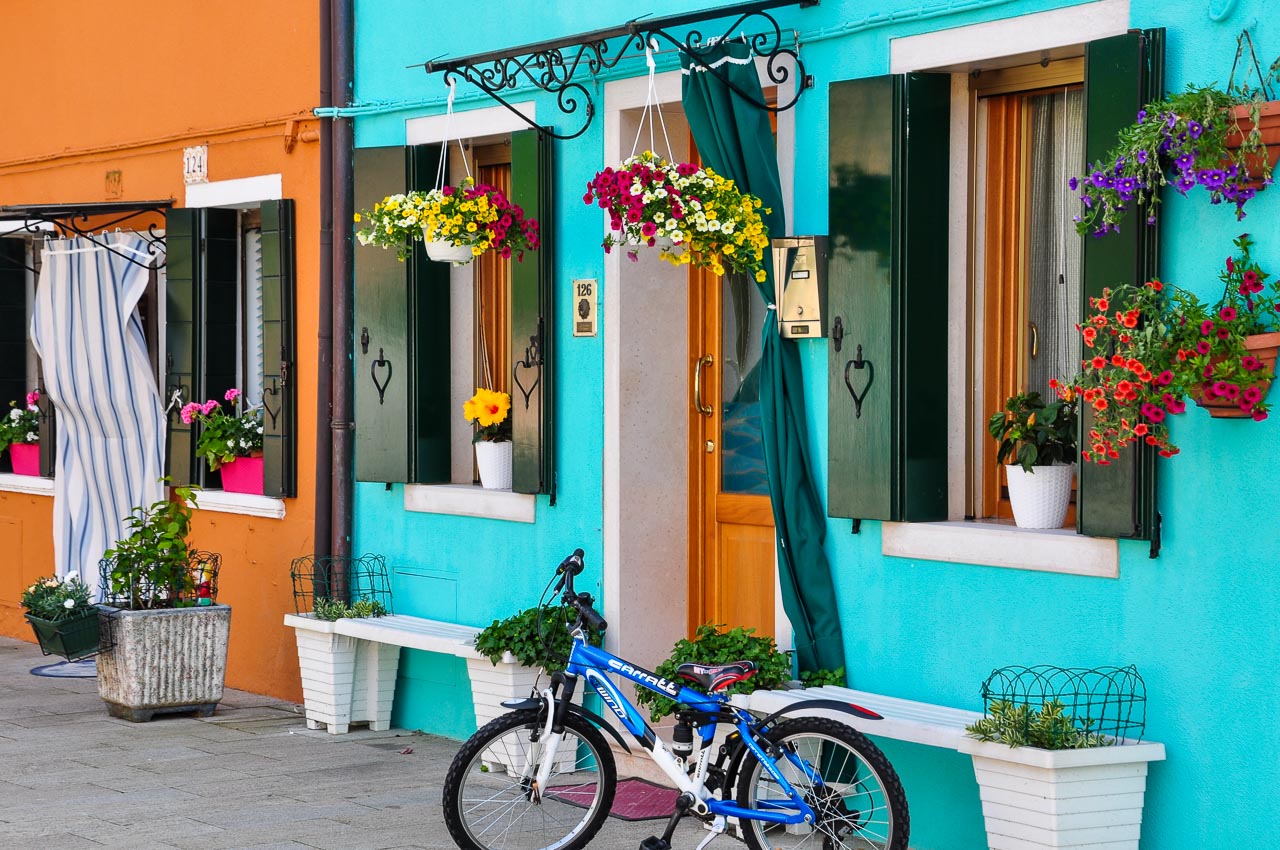
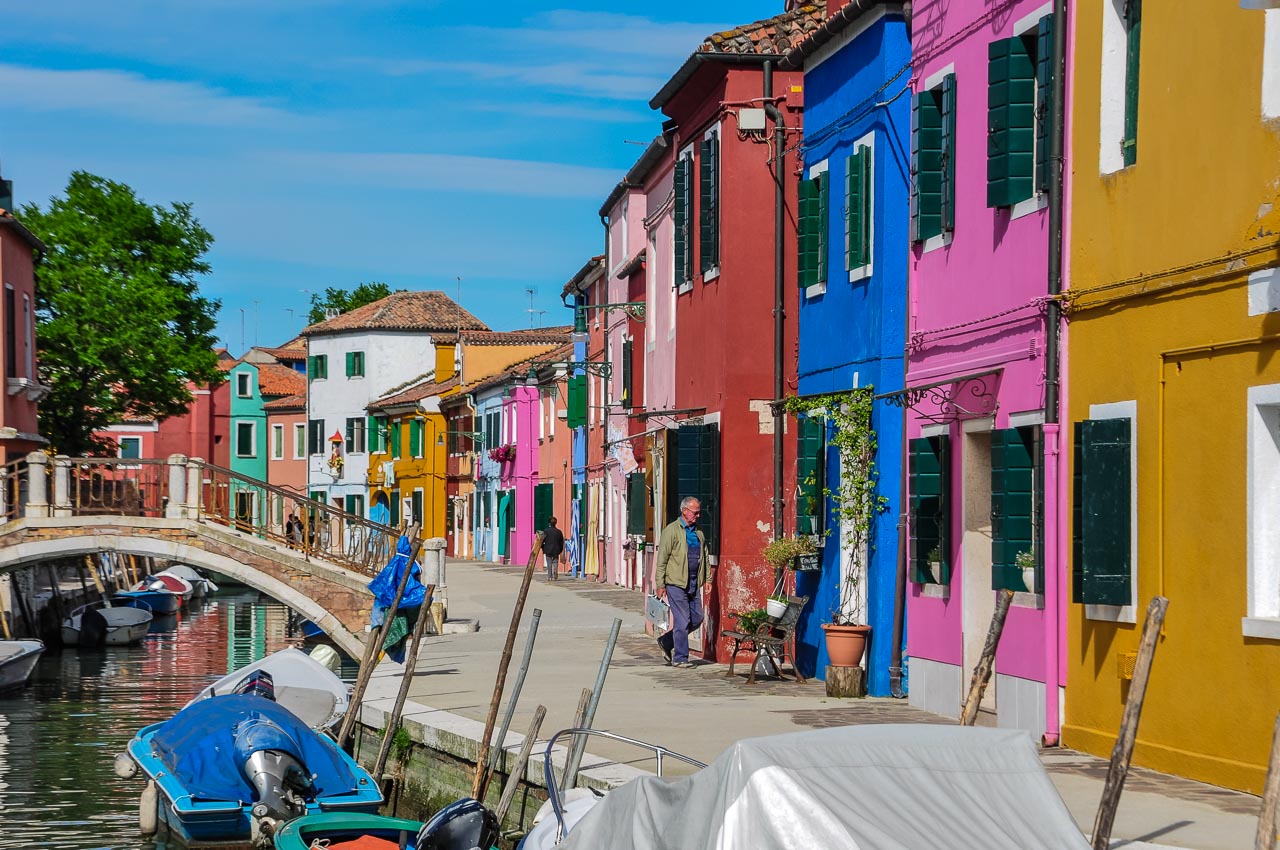
Leaving Murano, we motored to Burano. Burano is primarily a fishing village but is famous for its brightly coloured houses and handmade lace. After a lacemaking demonstration, my guide took me to the shop, Alessandro Tagliapietra Murano Glass Jewels. The owner of this small jewellery shop only sells what he makes. I had a lovely time choosing several pieces of handmade Murano glass jewellery – necklaces and earrings. So, I bought my Murano glass jewellery on Burano – go figure! Now totally satisfied, I wandered around Burano taking photos of the canals and coloured houses, chatting with the locals and discovering the 17th-century leaning bell tower.

There ends my self-guided, 5-day walking tour of Venice. Where will your feet take you?
When to go
I was in Venice in early May. According to the World Weather Organization, the average daytime temperature in Venice in May is 21.5OC (70.7OF), and the average number of rain days is 8.2.
The week I was in Venice, the daily temperature was around 23OC, but felt warmer. Perhaps all that water increases the humidity?
Being my first visit to Venice, and from what I had read, I expected tourists to be inundating Venice. I was pleasantly surprised by the reality of crowds in May. Sure, there were many tourists around St Mark’s Square and Rialto Bridge, but in most other areas, I was virtually on my own.
In my opinion, May is an ideal time of year to visit Venice. Not too hot, not too cold, little chance of rain, and limited crowds.
Getting there and away
My time on my own in Venice followed an 8-day river cruise on the Po River. As such, I had two arrivals in Venice – the first at Venice Marco Polo International Airport and the second, at Venice’s pier Marittima 123 (where most cruise ships dock).
I first arrived in Venice, at Marco Polo Airport, on a flight that was 36 hours delayed. Consequently, I had missed my pre-arranged private transfer from the airport to the ship. As a result, I took the Alilaguna water bus (vaporetto) Red Line (Linea Rossa) service from the airport to the Arsenale stop (the closest stop to the ship). Catching public transport proved to be very easy; leaving me wondering why I had organised a private transfer in the first place. The Alilaguna water-bus Red Line runs only from April to September. I was in Venice in May. See Alilaguna for lines and timetables throughout the year.
My second arrival in Venice was at pier Marittima 123. From a nearby canal, I took a water taxi to my hotel (Hotel da Bruno); as opposed to the vaporetto. The travel guide, Eyewitness Travel, describes the water taxis as a means of transport for those short on time and with lots of money. While I was neither time-poor nor wealthy, I baulked at the thought of managing my bags through the crowds around Rialto Bridge; especially as I was unsure how far the hotel was from the Rialto stop. So, a water taxi it was! Ninety euros later, the water taxi dropped me off at the canal beside my hotel. I won’t do that again! Knowing now how easy it was to get around Venice by vaporetto, I will be catching public transport on my next visit to Venice.
From Venice, I took the train to Rome. A friend had advised me to allow one and a half hours to get from my hotel to Venice’s Santa Lucia train station. I don’t know how my friend managed to take so long to get to the train station because it took me half an hour maximum. The trip time included walking from my hotel to the Rialto vaporetto stop on the Grand Canal and catching the vaporetto to the train station, also on the Grand Canal. Dead easy!
Where I stayed
I stayed at the Hotel da Bruno for my five nights in Venice. This hotel is all about location, location. Being only a 5-minute walk to Rialto Bridge and a 6-minute walk to St Mark’s Square), it is well-positioned to explore all Venice has to offer on foot.
However, I was bitterly disappointed with my room. I had booked a single room and was shocked when I saw it. My room was no bigger than a broom closet. It was dark and dingy, with outdated, tired furniture. The view from my window was that of the air shaft. Not a place I wanted to be! I tried to upgrade to a double room, but there were none available. Hotel da Bruno’s only saving grace was its location.
Would I stay again at Hotel da Bruno? Yes. But I would ensure I had a double room. As the saying goes: Better the devil you know than the devil you don’t! And location, for me, is paramount.
Disclaimer: This post contains no affiliate links. All views and opinions are my own and non-sponsored. All photos are my own and remain the copyright of Just Me Travel.
© Just Me Travel 2018-2023.
If you like this post, PIN it for keeps
You might also like
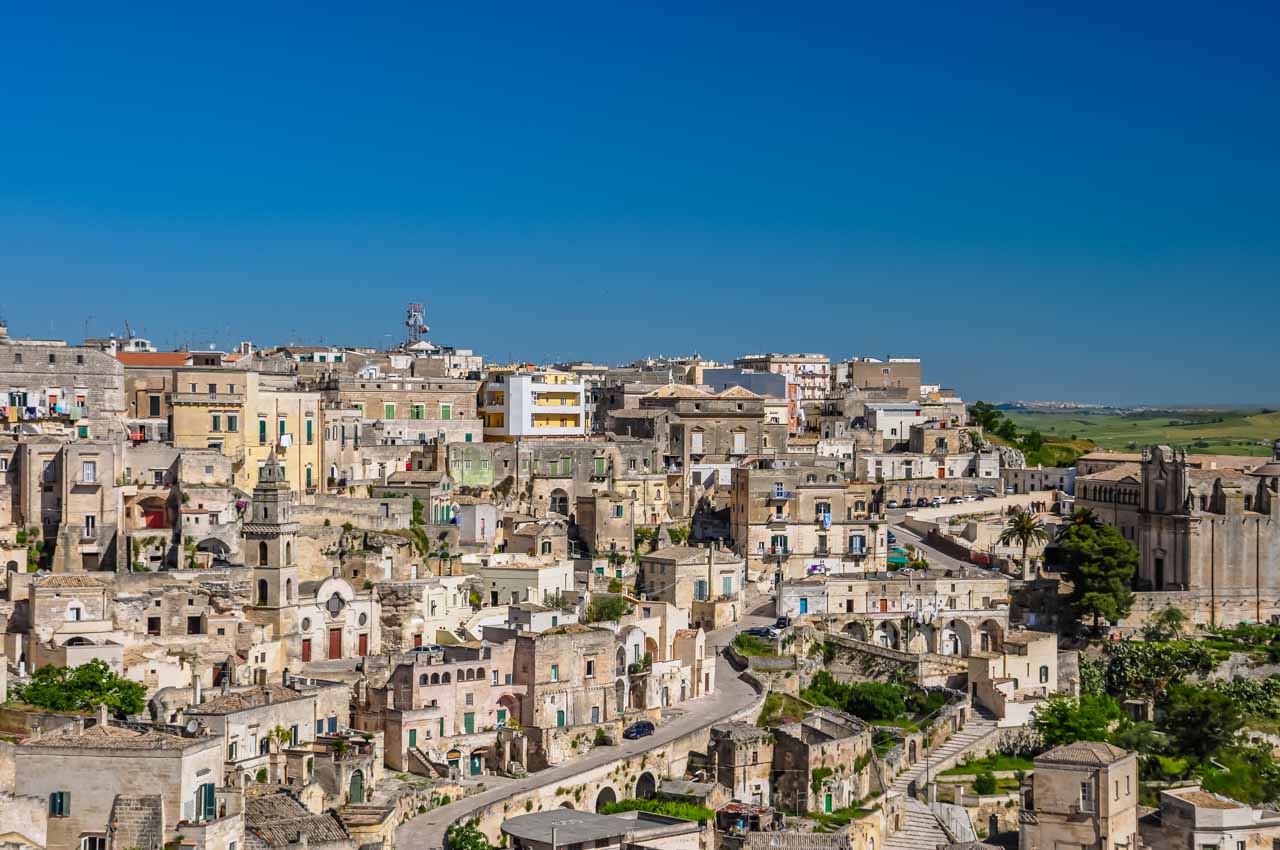
World Heritage Listed Sassi di Matera.
15 PHOTOS TO INSPIRE YOU TO VISIT THE UNIQUE SASSI MATERA, ITALY (2024 Updated)
Italy’s Sassi di Matera (Stones of Matera) is a unique and ancient destination of cave dwellings and a World Heritage Site. This post takes you on a visual journey through the troglodyte settlement of Matera’s Sassi.
18 Comments on A VENETIAN WALKABOUT – how to spend 5 perfect days in Venice, Italy [2020 UPDATED]